

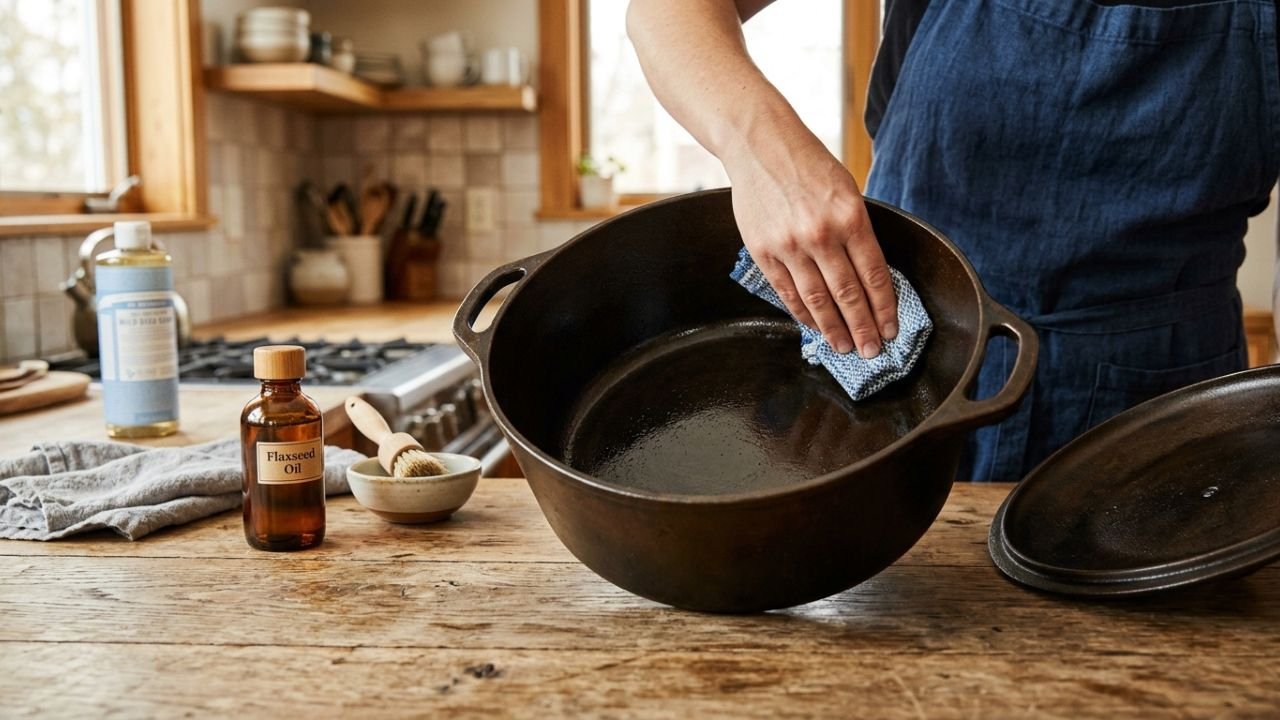
You just pulled that big, heavy cast iron Dutch oven out of the oven. The stew tastes amazing. Then you look inside and see stuck-on bits, maybe some grease, and that familiar panic hits. How do you clean this thing without wrecking the seasoning you worked so hard to build?
I get it. I’ve been there. One time I treated my Dutch oven like a regular pot, scrubbed it hard with dish soap, and watched the black coating peel off in sad little flakes. Never again. Today I’m walking you through exactly how to clean a cast iron Dutch oven the right way so the seasoning stays strong and the pot lasts for decades.
This is the stuff I wish someone told me years ago. No fancy jargon. Just practical steps that actually work.
Best Methods to Clean a Cast Iron Dutch Oven (Quick Overview)
| Method | Best For | Seasoning Risk | Time Needed | My Rating |
|---|---|---|---|---|
| Hot water + scrape | Everyday messes | Very low | 5 minutes | Excellent |
| Salt scrub | Light stuck-on food | Low | 5–7 minutes | Excellent |
| Boiling water | Medium stuck food | Low | 10–15 min | Very good |
| Chainmail scrubber | Tough bits | Low–medium | 5 minutes | Great |
| Full strip + re-season | Heavy rust or damage | High (temporary) | 2–3 hours | Necessary when needed |
Why Seasoning Matters More Than You Think
Seasoning is that shiny, black layer on your cast iron. It’s not just for looks. It creates a natural non-stick surface and protects the iron from rust.
When you cook, oils and fats polymerize (fancy word for turning into a hard coating). Over time this builds up and makes your Dutch oven better with every use.
Ruin the seasoning and food sticks. Rust shows up. Suddenly your favorite pot feels like a chore. Ever wondered why some people’s cast iron looks almost new after twenty years while others look like they dragged it behind a truck? It usually comes down to how they clean it.
I treat seasoning like a good friendship. You don’t scrub it away every time something goes wrong. You protect it and it keeps giving back.
What You Should Never Do When Cleaning Cast Iron
Let’s get the bad habits out of the way first. These mistakes wreck seasoning faster than anything else.
- Never soak it in water. Cast iron hates sitting in liquid. Rust starts forming almost immediately.
- Skip the dishwasher. The high heat and detergent strip seasoning and can crack the pot.
- Avoid regular dish soap most of the time. A tiny drop once in a while won’t kill it, but daily soap use will wear the coating down.
- Don’t use steel wool or harsh scrubbers unless you’re deliberately stripping everything for a full re-season.
- Never put a hot Dutch oven under cold water. Thermal shock can warp or crack it.
I learned the hard way about the cold water trick. I once rinsed a screaming-hot pot under the faucet and heard a weird ping. The bottom isn’t perfectly flat anymore. Lesson learned.
Everyday Cleaning After Regular Use
Most of the time your Dutch oven just needs a quick clean. Here’s the simple routine I use after almost every meal.
Step 1: Let It Cool a Bit
Pull the pot off the heat and let it sit for 10–15 minutes. You want it warm, not blazing hot. Warm metal cleans easier than cold metal, and you avoid that thermal shock problem.
Step 2: Scrape Out the Food
Grab a wooden spatula, silicone scraper, or even a plastic spatula. Scrape the bottom and sides while the pot is still warm. Most stuck bits come right off.
If something really clings, pour in a little hot water (just enough to cover the bottom) and let it sit for a few minutes. Then scrape again. The warm water loosens things without a long soak.
Step 3: Wipe or Rinse Lightly
I usually wipe the inside with a paper towel or a soft cloth. If it needs more help, give it a quick rinse under hot water. No soap unless something is truly greasy.
Step 4: Dry It Completely
This step matters more than people think. Water is the enemy of cast iron. Dry the pot thoroughly with a towel, then put it on a low burner for a minute or two to drive off any leftover moisture. I do this every single time.
Step 5: Add a Thin Layer of Oil
While the pot is still warm, rub a tiny amount of oil over the cooking surface with a paper towel. Think of it as a light moisturizing session. Too much oil leaves a sticky mess. Just enough to make the surface look slightly shiny works best.
That’s the everyday routine. It takes less than five minutes and keeps the seasoning happy.
How to Handle Stuck-On Food Without Panic
Sometimes food really digs in. Braised short ribs, cheesy pasta, or anything with sugar can leave a stubborn layer. Don’t reach for the steel wool yet.
The Coarse Salt Method
This is my go-to trick.
- Dump a generous amount of kosher salt into the warm pot.
- Add a little oil if the surface feels dry.
- Use a paper towel or soft cloth to scrub the salt around like a gentle abrasive.
- The salt acts like a mild scrubber that won’t destroy seasoning.
- Wipe everything out and rinse quickly if needed.
- Dry and oil as usual.
Salt works surprisingly well. I’ve rescued pots that looked hopeless with this method.
The Boiling Water Trick
For really stuck stuff:
- Fill the Dutch oven with about an inch of water.
- Bring it to a gentle boil on the stove.
- Let it simmer for 5–10 minutes while you scrape with a wooden spoon.
- Most of the gunk lifts right off.
- Dump the water, dry thoroughly, and oil.
I use this after cooking anything that caramelizes hard on the bottom. It feels almost like cheating.
When You Need a Chainmail Scrubber
A chainmail scrubber (those little metal mesh things) works great on cast iron. It scrapes hard without removing good seasoning the way steel wool does. I keep one in the drawer and use it maybe once a month. Just be gentle and follow up with oil.
Dealing with Rust on Your Cast Iron Dutch Oven
Rust happens. Even careful people get a little orange here and there, especially if someone else in the house “helps” clean.
Small Rust Spots
- Scrub the rusty area with a bit of oil and salt or a chainmail scrubber.
- Wipe clean.
- Dry completely.
- Rub on a thin layer of oil and heat the pot in a 350°F oven for an hour.
- Let it cool in the oven.
Serious Rust
If the whole pot looks orange and neglected, you may need a full strip and re-season. That’s a bigger project, but it’s doable.
I once left my Dutch oven outside during a camping trip (don’t ask). It came home covered in rust. I spent an afternoon scrubbing with vinegar and steel wool, then re-seasoned it three times. It came back better than before. Cast iron is tougher than most people give it credit for.
How to Re-Season Your Dutch Oven When Needed
Sometimes the seasoning gets thin or patchy. Re-seasoning brings it back.
Basic Oven Seasoning Method
- Clean the pot thoroughly (you can use a little soap this time since you’re rebuilding from scratch).
- Dry it completely on the stove.
- Rub a very thin layer of oil over every surface—inside, outside, and the lid. Flaxseed oil, grapeseed oil, or even Crisco work well. Avoid thick coats.
- Wipe off as much oil as you can with a clean paper towel. It should look almost dry.
- Place the pot upside down in a 450–500°F oven with a baking sheet on the lower rack to catch drips.
- Bake for one hour.
- Turn the oven off and let the pot cool inside.
- Repeat two or three times for a strong base layer.
Thin coats beat thick coats every time. Thick oil gets sticky and never fully hardens. I learned that the messy way.
Best Oils for Seasoning Cast Iron
Not all oils work the same. Here’s what I’ve tested over the years:
- Flaxseed oil – builds a hard, glassy layer but can flake if applied too thick.
- Grapeseed oil – high smoke point and reliable.
- Avocado oil – solid everyday choice.
- Vegetable shortening (Crisco) – old-school and effective.
- Avoid olive oil for high-heat seasoning. It has a lower smoke point and can leave a gummy feel.
I keep a small bottle of grapeseed oil just for cast iron. It’s cheap and consistent.
Long-Term Care Tips That Actually Work
A little prevention saves a lot of scrubbing later.
- Always dry the pot completely after cleaning.
- Store it with the lid slightly ajar or with a paper towel inside so air can circulate.
- Avoid cooking highly acidic foods (tomato sauce, wine reductions) for long periods until the seasoning is well established.
- Use it often. The more you cook with it, the better the seasoning gets.
- If you stack other pans inside, put a paper towel or cloth between them to prevent scratches.
I keep my main Dutch oven on the stove most of the time. It’s ready whenever I need it, and regular use keeps the surface in great shape.
Common Mistakes People Still Make
Even experienced cooks slip up. Here are the ones I see most often:
- Using too much oil when seasoning (sticky disaster).
- Putting the pot away while it’s still damp.
- Scrubbing with abrasive pads every single time.
- Thinking “seasoned” means you never have to maintain it.
- Buying a pre-seasoned pot and assuming it’s finished. Factory seasoning is a start, not the finish line.
I’ve made every one of these mistakes. The good news? Cast iron forgives a lot if you catch problems early.
Tools and Products That Make Cleaning Easier
You don’t need a ton of gear, but a few items help:
- Wooden or silicone spatulas
- Chainmail scrubber
- Kosher salt
- Paper towels (lots of them)
- A good quality oil for seasoning
- Soft cloths or microfiber towels
I avoid anything with plastic bristles that claim to be “cast iron safe.” Most of them are too aggressive. Simple tools work better.
FAQs About Cleaning Cast Iron Dutch Ovens
Can I ever use soap on my Dutch oven?
A tiny bit of mild soap once in a while is fine, especially if you’re about to re-season. Daily soap use is what causes problems.
Why does my cast iron smell weird sometimes?
Usually leftover moisture or food particles. Heat it on the stove for a few minutes after drying and the smell disappears.
Is it okay to clean a hot Dutch oven?
Warm is ideal. Screaming hot plus cold water is a bad mix.
How often should I re-season?
Only when the surface starts looking dull or food begins sticking more than usual. Regular use and light oiling after each clean keep most pots in good shape for years.
What if the lid doesn’t fit perfectly after cleaning?
Lids can warp slightly from extreme temperature changes. Avoid thermal shock and the fit usually stays true.
Can I put my Dutch oven in the oven to dry it?
Yes. Low heat for 10–15 minutes works great and guarantees it’s bone dry.
Final Thoughts
Cleaning a cast iron Dutch oven doesn’t have to feel like a science experiment. Treat the seasoning with respect, keep water contact short, dry the pot completely, and add a whisper of oil when you’re done. That’s really the whole game.
I’ve used the same Dutch oven for over a decade now. It’s been through camping trips, holiday dinners, and more than a few kitchen disasters. The seasoning is better today than when I bought it because I stopped fighting the material and started working with it.
Next time you finish cooking, take those few extra minutes to clean it properly. Your future self (and your food) will thank you. Grab that pot, scrape it out, dry it well, and keep cooking. You’ve got this.


